How to ride in WATAKATA — FATRACING virtual races
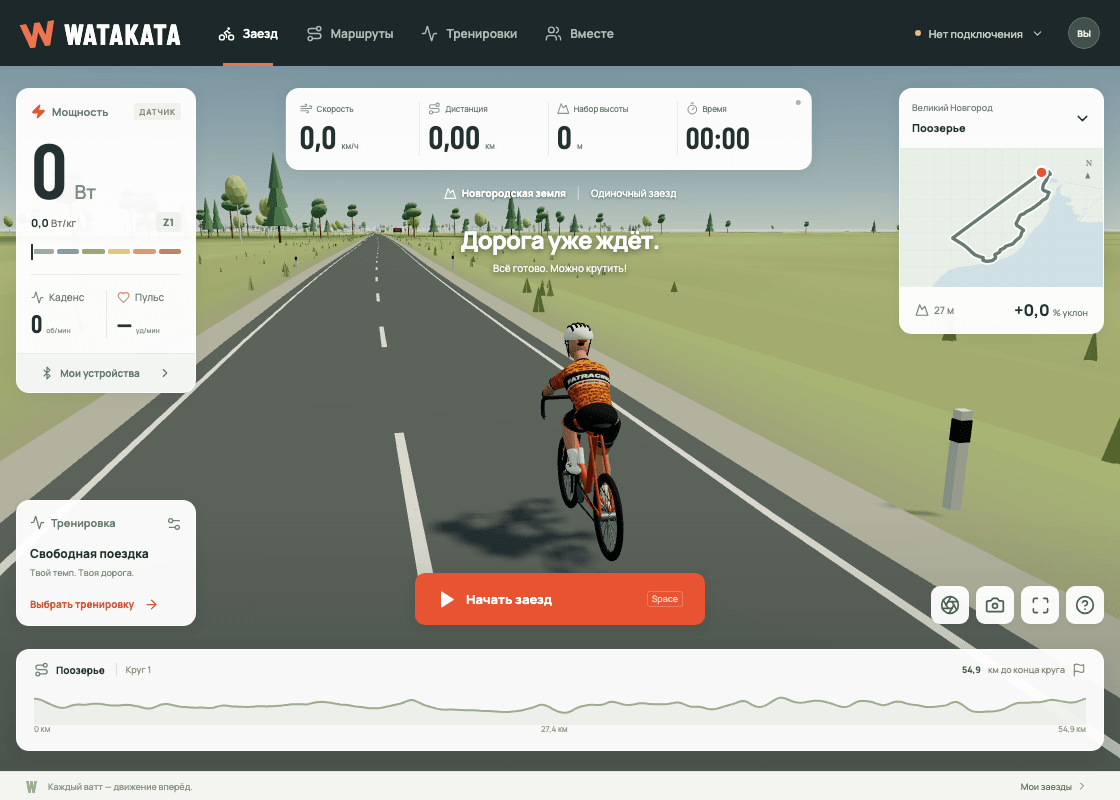
WATAKATA is our bike simulator, which opens at watakata.fatracing.ru right in the browser: you don't need to install or buy anything. You are pedaling on your machine, and in the 3D world you are driving along the real rings of Novgorod region and the tracks of our races. Go through the first check—in in the steps below - from connecting the machine to recording in your personal account.
1. What is WATAKATA
WATAKATA opens at watakata.fatracing.ru — this is a regular page, not a program: you don't need to install anything, you already have an account if you go to FATRACING.
The roads are real. In the game there are 18 rings of Novgorod region according to the maps of the authors of the routes with 53cycling.ru on a scale of 1:1 — from Yuriev (14.2 km) to the Luga Ring 300 (287 km), plus two of our race tracks: the Tsar Grader circle and the Tour de Selishchi. The heights are taken from terrain data, lakes and rivers are from OpenStreetMap, so the ascents and views coincide with what you see live on these roads.
Speed is calculated by power, slope, your weight and resistance: it's harder on the rise, you can roll downhill. The check-in is recorded and gets into FATRACING's personal account as a regular workout.
2. What you need before starting
You need a computer or Android phone with the latest Chrome, Edge or Brave: access to the sensors is via Web Bluetooth, but it is not in Safari or in any browser on iPhone and iPad. The game will open from Apple, but the machine will not connect to it.
We need a power source: a smart machine with Bluetooth FTMS or a Cycling Power / speed-cadence sensor. Without it, the check—in will not go - there is no mode without equipment in WATAKATA, the speed is taken from your watts. The heart rate monitor via Bluetooth is connected separately and optionally.
Free the machine from other applications: one device gives data to only one program at a time. If the machine remains connected to the phone or to the "Machine" page it will not appear on our website, in WATAKATA.
3. Log in via your FATRACING account
Click the round button with your initials at the top right — the "Cyclist Settings" will open — and select "Log in via FATRACING". Login takes place on the main site, after which you return to the game: the site and the game have a common session.
What gives entry: name and avatar in joint races, and weight and FTP are pulled up from your profile — from measurements in the bot, from the rider's card or from the connected Intervals.icu. Any value can be corrected with your hands directly in the settings, the game will not affect your edit.
The main thing is that the "Save arrivals to the FATRACING account" switch is turned on: without it, the check—in will remain only in the browser. If the machine is already connected, the input will open in a new tab — this is done on purpose, because leaving the page breaks the Bluetooth connection.
4. Connect the machine and sensors
Open "My devices" in the left column and connect one at a time: machine, heart rate monitor, power meter. The browser will show its device selection window — permission is granted only after you click, the page does not search for sensors itself.
If a separate power meter is connected, its power and cadence are more important than machine tools. The game discards data older than five seconds, so the "stuck" digit will not appear on the screen: the connection is lost — the value will reset to zero.
With the FTMS machine, ERG is available: the game itself holds the target power of the interval, and you spin with an even cadence. If the model does not support the control, the readings are still readable — just adjust the load by gears.
Nothing is found or the connection breaks — the analysis of frequent causes is collected in a separate guide.
5. Select a route
The "Routes" button opens the "Where are we going?" window. The routes are divided into groups: cycling, highway, dirt and grader, MTB, brevets and races. The card shows the distance, climb, coverage and approximate lap time, so you can choose according to the task of the lesson, and not at random.
Your own track is also suitable: a GPX file from Strava, Garmin, Komoot or scheduler becomes expensive right in the browser and ends up in the "My Tracks" group. The file is not uploaded anywhere — it remains in your browser. An unclosed track game drives back and forth.
The following link leads to the selected route watakata.fatracing.ru/?route=poozerje — it is convenient when we agreed to ride on the same ring.
6. Free ride or workout
In the "Training" block on the bottom left are "Free Ride", "Aerobic base", "Threshold intervals" and "Easy Recovery". You can upload your task with the "Upload .ZWO" — from the designer, from the trainer's plan, or from any service that gives this format.
Interval targets are counted from FTP. Check the "Threshold power" field before starting: with FTP 250 W, the goal of 60% is 150 W, and with FTP 200 W, it is already 120 W. You can collect your task in the training constructor, there also lie ready-made files.
7. Check-in and management
Click "Start check—in" - or the space bar, it also pauses. The C key changes the camera, the individual buttons on the bottom right turn on the full screen and take a picture. While the race is going on, the screen of the phone and tablet does not go out: hands are busy driving.
If you minimize the tab, the check—in will pause - this is protection from "driving in the background". The recording is saved every 30 seconds, on pause and at the finish line, and the last 20 races are in "My races" at the bottom right.
The game can be put on the home screen of your phone or tablet: it will open as a separate window without an address bar, like a regular application.
8. What happens after the finish
After "Complete check-in", the results will open. When saving is enabled, the check—in goes to your personal account - tab "Training"; if Strava is connected to the account, the training will be queued to be sent there, and when connected Intervals.icu it will leave and its copy. Keys to these services remain on the website and do not get into the game.
Check-in can be picked up by file: .FIT for Strava, Garmin Connect and Intervals.icu or .TCX for services that need XML. Both have time, distance, altitude, power, speed, cadence, pulse and track coordinates, so after manual import, the workout will have a map.
The "Snapshot" button saves a frame from the world with a bar: route, distance, time and average power. The system "Share" will open on the phone, and the snapshot will be saved as a picture on the computer. Strava does not accept photos via the API, so the picture is attached to the workout with your hands.
The message about the end of the check—in is not yet a confirmation of sending: if Strava or Intervals are important, check that the training appeared there. The downloaded file remains your backup copy.